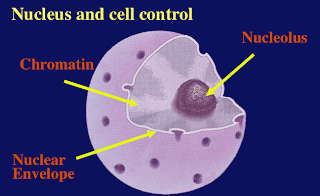
1. Create or find a relevant picture (using google image search, screen capture or Doodle Buddy...)
2. Place the picture on your laptop's desktop. Give it a title that includes its title and your name. For example - "nucleusmrsknapik"
3. Using Word or another text program, compose your description. For example: " I've included the picture, to the right, of the nucleus, because it shows how the nucleus is a sphere with dimples that are actually pores. Material moves in and out of the nucleus through those pores."
4. Locate the "add image" icon on the menu bar below the title. Click it.
5. On the left-hand side, locate "choose file". Then select your desktop picture. Follow instructions, which includes an "upload now" (or something like that). Notice - you get to pick how your picture shows up (left, centre or right) and the size. The picture that I've put on this blog is on the right and is a medium size.
6. Don't forget to Publish Post! Then view and if you don't like it, make changes.
7. Finally, open your text file and open the edit post, and copy and paste the description into your post.
8. Publish Post again and read it over, to be sure that you are satisfied.
No comments:
Post a Comment